Brewing With Grainfather- Tips and Ideas
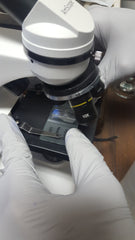
More and more people are making the switch to electric all-grain brewing, and the Grainfather has been instrumental in making this happen. If you aren't familiar with it, the Grainfather is a stainless all-in-one brew system with a pump, digital controller (now with Bluetooth!), and counterflow chiller. The one thing you need to add to this all-in-one, is a way to sparge. You can heat up water in your old brew kettle for this purpose, or there's a Grainfather Sparge Water Heater unit that can electrically heat up to 4.8 gallons of sparge water.
Like any brew system, the Grainfather has its own quirks, idiosyncrasies, and system numbers that you need to figure out. I was an early adopter of the Grainfather, purchasing one here at the shop as soon as it was available. At the time, both Beersmith and the Grainfather calculators failed to give me the water volume numbers I really needed to be consistent; it took several brews before I got it dialed in. Before diving into water specifics, let me go over what I see as the pros and cons of this system.
Pros:
- It is compact, so it's easy to take to a friend's home for a brew day and it stores well, even in homes with little space to spare.
- It's all 304 stainless, so there's no concern of extracting off flavors or chemical compounds from other materials such as plastic.
- Conserve water. The mash basket fully drains into the kettle once lifted out, so you have zero loss from dead space (as is in the bottom of a traditional false bottomed mashtun).
- Digital temp control is great for step mashes and single infusions. The new Connect controller features bluetooth and a more sophisticated PID for even more control. You can even set the Grainfather to start at a certain time so that by the time you get out of bed, your water is at mash temp and you're ready to dough in.
- The magnetic drive pump works very well both for recirculating during the mash and for running the wort through the very efficient counterflow chiller. Both of these items also make it easy to drop temp below 180F and make whirlpool hop additions.
- U.S. version uses 120V power, so you don't need to have 240V power wired in.
Cons:
- U.S. version uses 120V power, so the max output on the heating element is 1600W, as opposed to 2000W for the AUS/NZ/UK model. This means it is not quite as fast/powerful as one might hope, especially if you're used to ramping up quickly with a propane burner.
- The pump filter clogs easily with protein and hop material, causing a slow transfer through the chiller and into the fermentor.
Fortunately, when it comes to the weaknesses of this system, you have solutions to largely mitigate these problems. Using the Graincoat, a custom-tailored insulated jacket for the Grainfather, is a tremendous help in retaining heat; this helps compensate for the "underpowered" element and maintain mash temps as well as heat water and wort more quickly. I will not use my Grainfather without the Graincoat ever again. As for the filter, using a stainless hop spider or even just a nylon strainer bag will keep the bulk of the hop material contained and the pump flowing smoothly. Boom! Easy!
Now, for the numbers. How much water do you use to mash? To sparge? What's the evaporation rate? Instead of laying this out in a clunky paragraph, here are key points that I have found and apply when preparing my recipe and going through brew day.
- Water to grist ratio: 1.6qt water per pound of grain.
- Grain Water Retention: This may vary slightly due to several factors, but in general, your grain will retain .8 fluid ounces of water per 1 oz (weight) of grain. More simply, your grain will absorb 1/4 of the water you mash in with if you're using 1.6qt/lb as I recommend.
- Evaporation rate: This really threw me off for awhile, as the evaporation rate is much lower---about half---as when I boil with propane. Again, multiple factors can affect your exact boil off rate, but it's .5-.6 gallons per hour; I typically assume .55 gallons per hour.
- Trub loss: Using a hop spider really helps maximize yield. I lose about .75 gallons to trub in the bottom of the kettle and wort left in the pump's recirculation arm. The bottom of the grainfather is dished, with the pump inlet elevated above the dish. This is nice as it allows proteins and other particulates to settle out below the intake. When I'm almost finished running the wort into the fermentor, I will sometimes tilt the Grainfather so as to pull more wort into the pump (assuming it's "clean" wort and not just protein-laden sludge).
- Sparge Water: Easily calculated once you know all the elements above and what you want your pre-boil volume to be. Allow me to walk you through how I go about making my calclulations-
EXAMPLE: I'll break this into steps to make it easier to follow.
1) I want to brew a blonde ale and end up with 5 gallons in my keg. To do this, I want 5.25 gallons of wort in my fermentor; the extra .25 is my sacrificial volume for trub.
2) I'm going to lose .75 gallons to kettle trub, so that means I actually need 6 gallons of wort post-boil.
3) This point is where there's a bit of an efficiency trade-off. Except for smaller session beers, to fully sparge your grain, you'll have a larger pre-boil volume, which means a longer boil time. You can alternatively slightly undersparge and not have to boil as long. The latter is what I do, but his sacrifices some efficiency since you're leaving more sugar behind in the grain; you can compensate for this by using more grain in your grain bill. Simply note your efficiency in your brew software so that you can adjust recipes accordingly. I opt for a 1.5 hour boil. With an evaporation rate of .55 gallons/hour, this means I'll lose .825 gallons over the course of my boil. 6 gallons post-boil plus .825 gallons evaporated = pre-boil volume of 6.825 gallons.
4) So how much do I sparge with to reach my pre-boil volume? Here we have to look at how much water I use at each stage. Let's say this blonde ale uses 10lbs of grain. To mash: 10lb x 1.6 qt water = 16 qts. Divide number of quarts by 4 to get gallons. 16/4 = 4 gallons. My grain will then absorb 1/4th of the mash water, so if I were to just drain the mash basket into the kettle, I'd then have 3 gallons in the kettle. To sparge: Preboil volume of 6.825 minus 3 gallons leaves a difference of 3.825 gallons needed to sparge. NOTE: Again, you may wish to improve your mash efficiency a bit by sparging more and boiling longer. My efficiency ranges from 75-78%. For me, a few more percentage points aren't worth an extra 30-45 minutes boil time. For session ales, more sparging typically isn't necessary since you may actually oversparge and extract tannins; it's the higher gravity beers where you really have to decide between efficiency and time.
In summary, the Grainfather is a really fun unit that does what it's supposed to and may help automate your brewing enough to where you can accomplish more on brew day. Like any system, getting to know the numbers is crucial for consistency, and I hope this guide helps you dial it in more quickly. I highly recommend investing in brewing software to help with recipe formulation and
- Theodore Clevenger
Comments 1
William Marytn
Hi, I read your blog. I am a huge fan of your post. The way of conveying the info is too good. keep on.
Grainfather